
Indulge in Decadence with the Ultimate Gluten-Free Red Velvet Cake Recipe
- Gluten Free Dad
- Nov 5, 2025
- 4 min read
Red velvet cake is not just a dessert; it's an experience that delights the senses with its vivid color and rich flavor. For those avoiding gluten, the traditional recipe can seem out of reach. But fear not! In this post, we’ll walk you through making a gluten-free red velvet cake that retains all the decadence of the classic version.
Whether you’re celebrating a birthday, anniversary, or just treating yourself, this cake is sure to impress everyone at the table. Let's embark on this gluten-free baking adventure together!
The Ingredients You’ll Need
Gathering high-quality ingredients is key to a successful gluten-free red velvet cake. Here’s what you’ll need:
Gluten-Free Flour Blend: Choose a blend that includes xanthan gum, as this helps mimic the texture of wheat flour.
Cocoa Powder: Use unsweetened cocoa powder for a deep chocolate flavor, ideally with a minimum of 20% cocoa solids to enhance richness.
Baking Powder and Baking Soda: These leaveners help create a light cake. Notably, 1 teaspoon of baking powder can lift the cake up to 70% more than a heavy batter might.
Sugar: About 1 ½ cups of granulated sugar ensures your cake is sweet and moist.
Vegetable Oil: 1 cup of oil keeps the cake tender, and it helps achieve that oh-so-important moisture.
Buttermilk: The acidity of buttermilk not only adds flavor but also makes your cake softer. Use 1 cup for the best texture.
Eggs: Three large eggs contribute to the cake's structure and moisture.
Red Food Coloring: A full tablespoon will give your cake that iconic vibrant hue.
Vanilla Extract: 1 teaspoon of vanilla can enhance the overall flavor profile.
Cream Cheese: For frosting, about 8 ounces of cream cheese is crucial for that classic tang.
Powdered Sugar: Use approximately 4 cups to sweeten your frosting without making it gritty.
Butter: Unsalted butter, around ½ cup, adds a rich, creamy flavor to the frosting.
With these ingredients, you are all set to start your baking adventure!
Preparing the Cake Batter
Let’s make a smooth and delicious batter. Follow these easy steps:
Preheat Your Oven: Start by preheating your oven to 350°F (175°C). Grease two 9-inch round cake pans to prevent sticking.
Mix Dry Ingredients: In a large bowl, whisk together 2 cups of gluten-free flour, 3 tablespoons of cocoa powder, 1 teaspoon of baking powder, 1 teaspoon of baking soda, and a pinch of salt.
Combine Wet Ingredients: In another bowl, beat together 1 ½ cups of sugar and 1 cup of vegetable oil. Add in 3 large eggs, 1 cup of buttermilk, 1 tablespoon of red food coloring, and 1 teaspoon of vanilla extract. Mix until the mixture is perfectly smooth.
Combine Both Mixtures: Slowly add the dry ingredients to the wet mixture, gently stirring until just combined. Avoid overmixing to keep your cake fluffy.
Pour and Bake: Evenly divide the batter between the prepared pans and smooth the surface. Bake for 25-30 minutes, checking with a toothpick; it should come out clean when the cakes are ready.

Making the Cream Cheese Frosting
While your cakes cool, you can prepare the cream cheese frosting. Here’s how:
Beat the Butter and Cream Cheese: In a mixing bowl, beat ½ cup of softened unsalted butter and 8 ounces of softened cream cheese together until creamy and well blended.
Add Powdered Sugar: Gradually mix in about 4 cups of powdered sugar until well combined. Tweak the amount of sugar according to your preferred level of sweetness.
Flavor It Up: Add 1 teaspoon of vanilla extract for extra flavor. Mix until everything is smooth and luscious.
Chill If Necessary: If your frosting seems too soft, chill it for about 15 minutes to make spreading easier.
Assembling the Cake
Once your cakes have cooled completely, it’s time for assembly:
Level the Cakes: If your cakes have domed tops, use a serrated knife to level them. This ensures they stack evenly.
Layer the Frosting: Place one layer on a serving plate and spread a generous amount of cream cheese frosting on top.
Add the Second Layer: Place the second cake layer on top and frost the top and sides thoroughly with the remaining frosting.
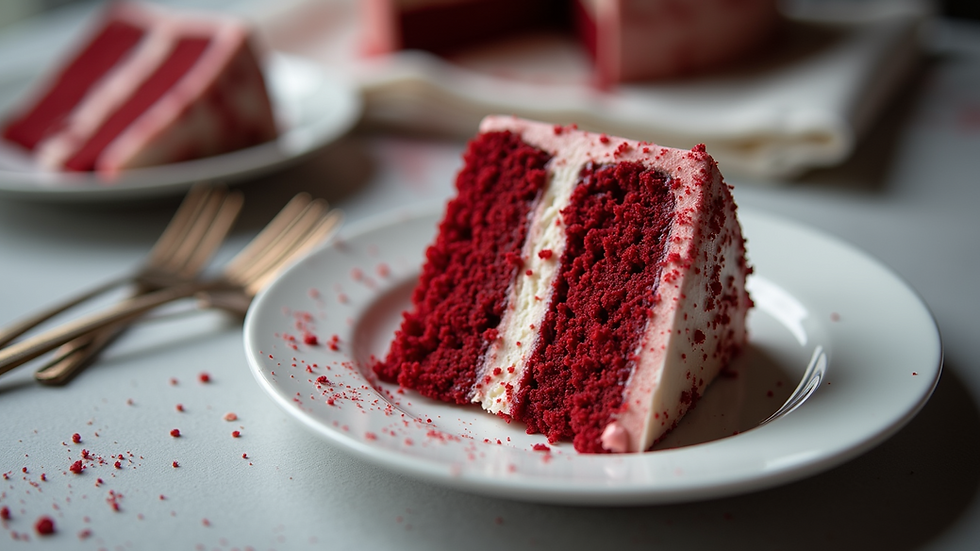
Decorate: For a charming touch, consider sprinkling a little cocoa powder or red velvet cake crumbs on top. It adds a nice visual appeal!
Serving and Enjoying
Your gluten-free red velvet cake is now ready to delight! Slice it into generous pieces and share the moist, flavorful layers with friends and family. This cake is versatile enough for birthdays, anniversaries, or any gathering where you wish to impress.
Remember to store leftovers in an airtight container in the fridge. The flavors will meld together beautifully, making the cake even tastier the next day!
Final Thoughts
Baking a gluten-free red velvet cake can be an enjoyable and rewarding task. With quality ingredients and a pinch of care, you can whip up a dessert that is both gluten-free and exquisitely indulgent. This recipe will undoubtedly satisfy your cravings and leave a lasting impression.
So, whether you’re gluten-sensitive or simply eager to try something new, venture into the world of gluten-free baking with this ultimate red velvet cake recipe. You will not regret it!


Comments